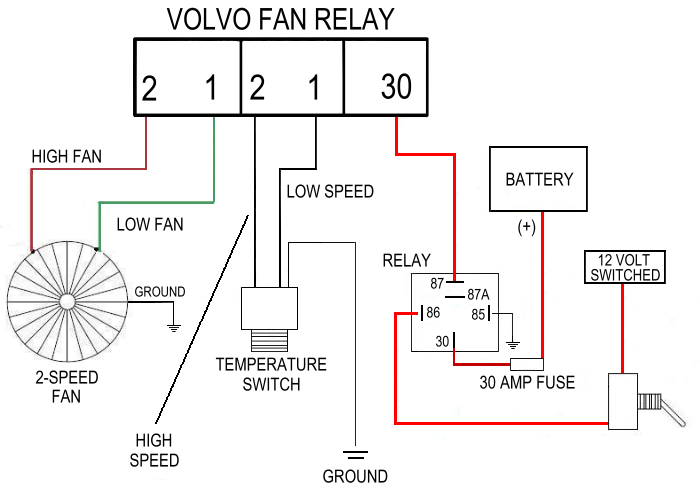
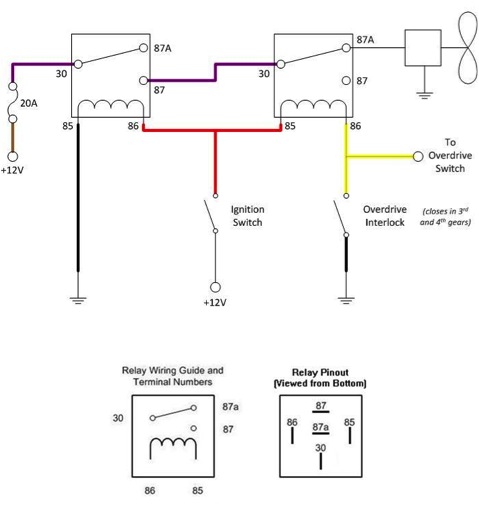
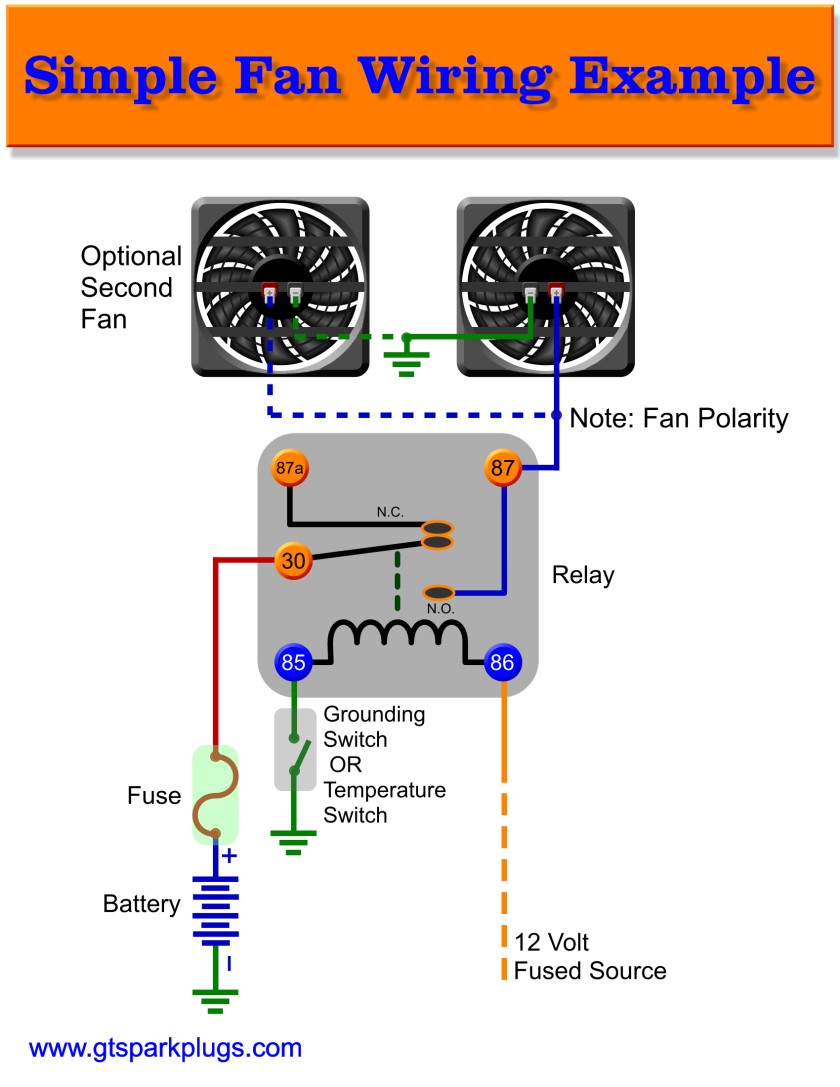
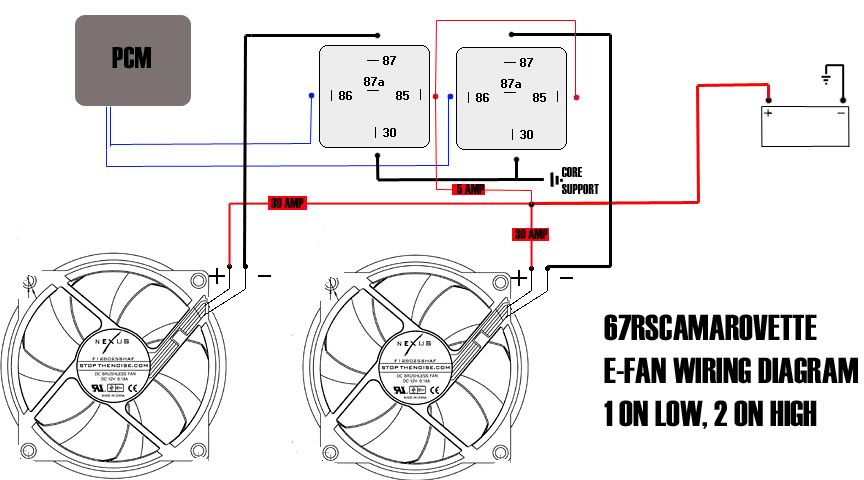
Today we will talk about how i wired my mk3 vr6 electric fans with 2 speeds using. Then connect switched power usually from your ignition switch to the blue wires on both relays tab 86.
Aftermarket Electric Fan Wiring Ls1tech Camaro And
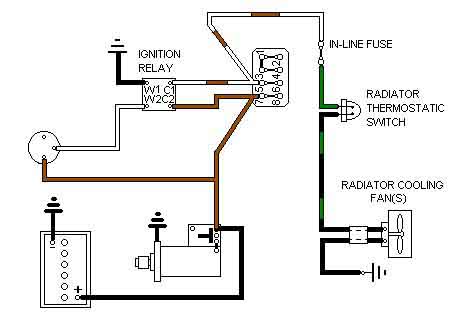
How to wire electric fans. How to wire an electric fan with a relay on a classic car installing the thermostatic sending unit. Its unlikely you would have room for both but you should never run a mechanical fan with an electrical fan on the same side of the radiator. Installing an electric cooling fan or radiator fan can be intimidating. Here is only some of the equipment we need to have in order to make this possible. Next splice together both black wires from the relays tab 85 and connect them to the thermostat switch. Some times any car wiring project is hard.
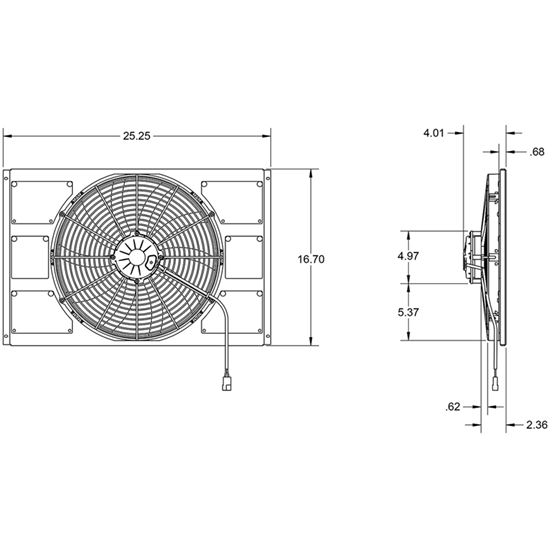
The first part of the installation is to install the electric fan to your radiator and remove the mechanical fan. Install the temperature controlled sending unit in one of the cooling passage. One main safety step is to unhook the black negative wire from the battery and when you do so make. For this set up we also used two of the speedway universal electric radiator cooling fan part number 910158 which comes in a 10 12 14 or 16 inch diameter. A relay kit our part number ccfkrl will include everything you need to properly wire up your electric cooling fans with the exception of additional wiring needed to complete all of the circuits. Mounting the electric fan relay.
The color coded diagram below will correspond with the wires on the relay kit to help simplify the wiring process. Where to mount the relay is up to you and painless performance supplies a. Start your wiring project by taking both of the positive wires from the fans and run them to the yellow wires on each relay tab 87. How to wire a cooling fan to your car diy electric step 1.
Gallery of How To Wire Electric Fans