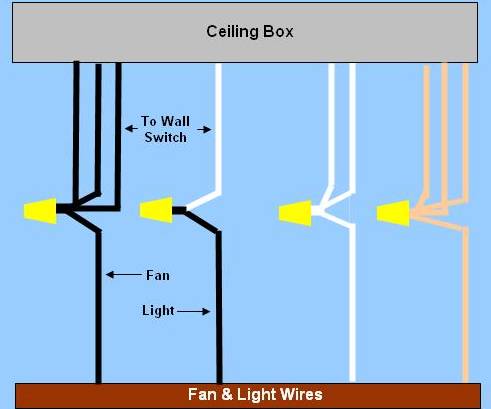
This setup allows you to control the light and fan separately. Connect the lighting wire typically blue to the black fan wire and the black ceiling wire.

Wiring A Ceiling Fan And Light Pro Tool Reviews
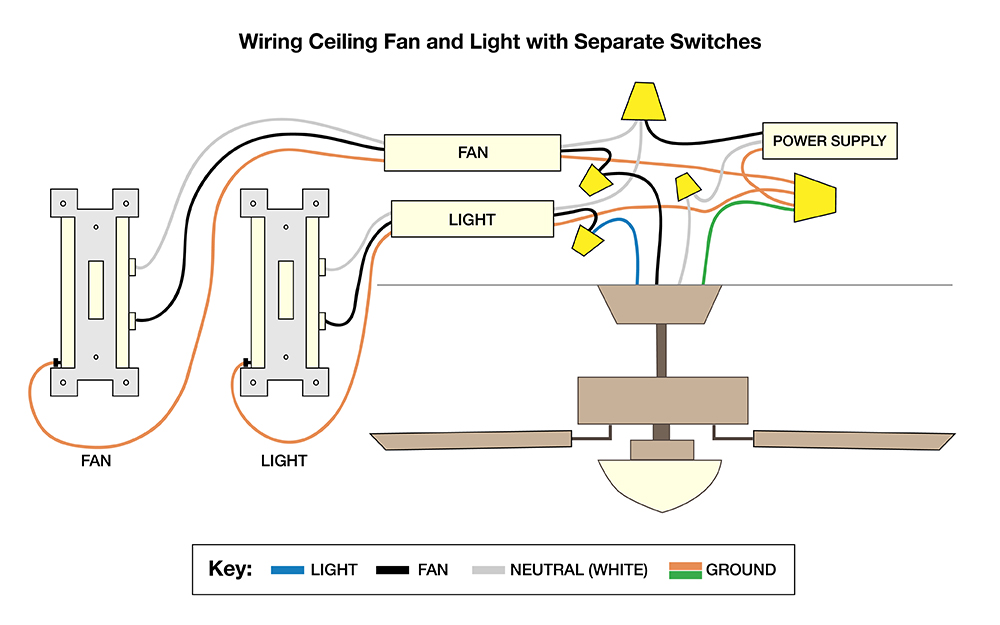
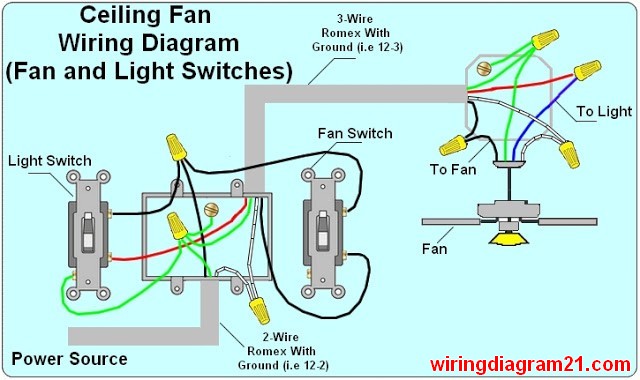
Wire a ceiling fan with two switches. A remote controlled ceiling fan utilizes the free space within the fans canopy. Wiring a ceiling fan with two switches assemble the ceiling fan. Connect the two white wires in the switch box together with a wire nut. A remote is installed within the fan and one of the two wall switches is bypassed in order for remote access. Remove the old. Connect white wires together.
Attach the red and black wires from the fan light unit to the top terminal screws on the switches. Connect the greencopper wires together. 3 wire cable from 2 nd ceiling outlet down to the second 2 gang box for fan light control. Wiring a ceiling fan is not hard but it is dangerous. Fan speed would need to be controlled by a pull chain. One of the switches within the working of the fan is connected to a remote which can be controlled as you may guess remotely.
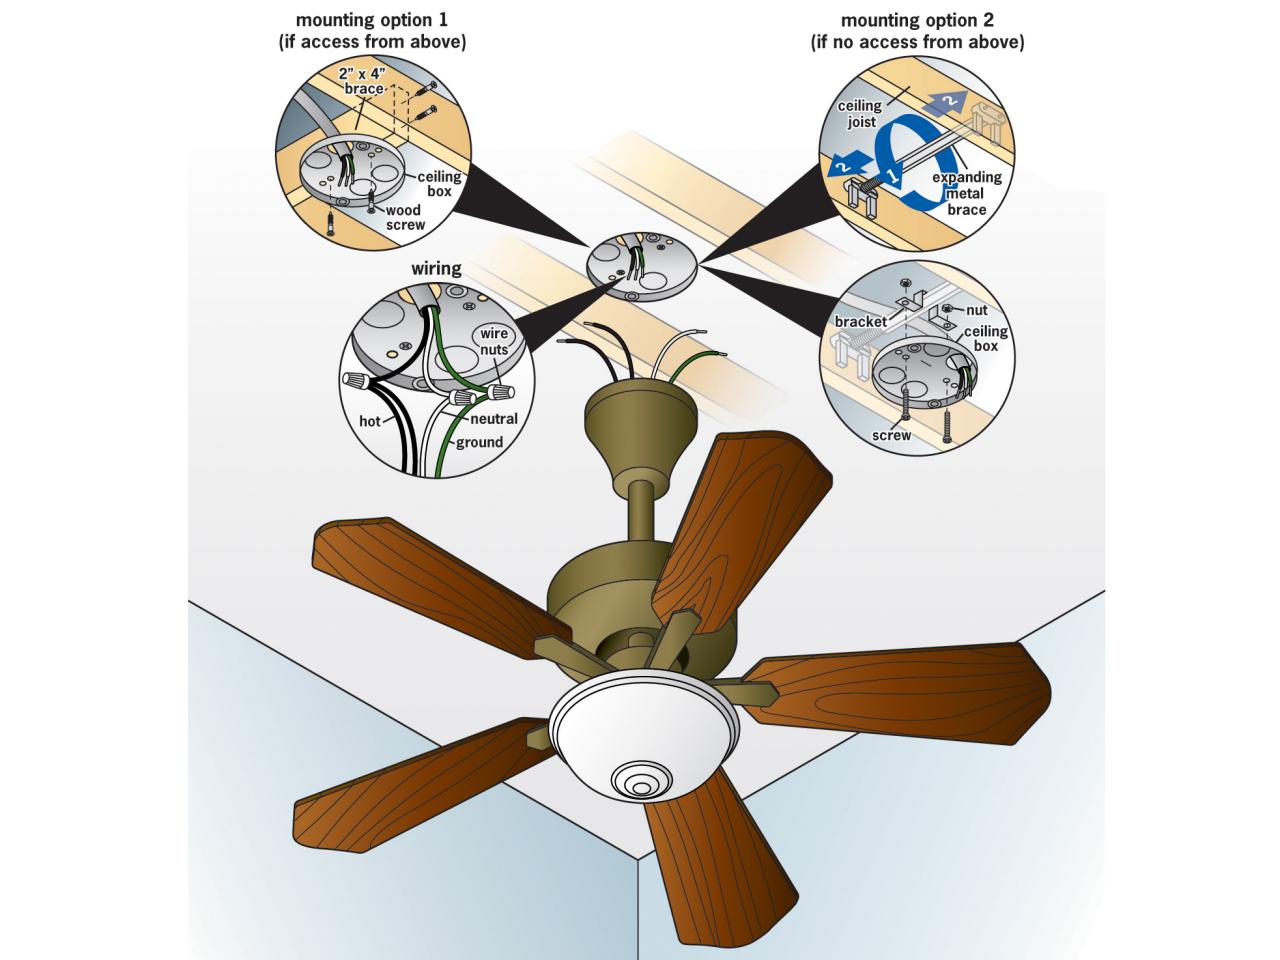
Prior to removing the cap or the old ceiling fan you need to assemble the new one. Connect two of the black. Ceiling fan wiring two switches this ceiling fan wiring configuration is quite common. Tuck the wires back into the box. 2 wire cable power out to the second ceiling outlet box 3 wire cable switch legs from first ceiling outlet down to a 2 gang box for the first set of switches for ceiling fan light control. Turn the power back on and test the fan.
Connect black wires together. If you are not careful you can electrocute.
Gallery of Wire A Ceiling Fan With Two Switches